¶ Ripping Models
A step-by-step guide by Xisifer
By popular request, I'm writing up a step by step guide to ripping models and getting them into game in SWLOR / NWN. This method works with almost any game on PC, but for purposes of this guide, I'll be writing it targeting the MMO Star Wars: The Old Republic since it has the largest amount of assets that fit the setting and timeline of SWLOR.
All questions and issues you run into can be directed to me on Discord: Xisifer#7946.
I won't be covering the process for setting up a local server for SWLOR, since that can be found here: /Development/Environment-SetUp
Required Programs
- NinjaRipper 1.7.1 : https://www.mediafire.com/file/z1w91t5keytvq3r/ninjaripper1.7.1_with_new_script.7z/file
- The main ripper program. A newer version is out, but it doesn't play well with older games like SWTOR.
- Noesis: https://richwhitehouse.com/index.php?content=inc_projects.php&filemirror=noesisv4464.zip
- A program for viewing and exporting 3D models from a wide variety of sources.
- Plugin for viewing the
.ripfile that NinjaRipper exports: https://www.dropbox.com/s/78dmlurg2ew2o66/fmt_ninjaripper_rip.py- (Place this file in the install directory for Noesis, inside:
plugins/python.)
- (Place this file in the install directory for Noesis, inside:
- Blender: https://www.blender.org/download/
- The 3D modelling program used to export models for NWN
- Plugin for Neverwinter Nights models: https://neverwintervault.org/project/nwn1/other/tool/neverblender-28
- Plugin Installation: https://nwn.wiki/display/NWN1/NeverBlender#NeverBlender-Installation
¶ Setup Process
- Extract the NinjaRipper archive to a location on your computer (for example, making a new folder on Desktop called
SWLOR Modding) - Extract the Noesis archive to a location on your computer (for example, making a new folder on Desktop called
SWLOR Modding) - Run
NinjaRipper.exe - Select the
…button next to theRunbutton.
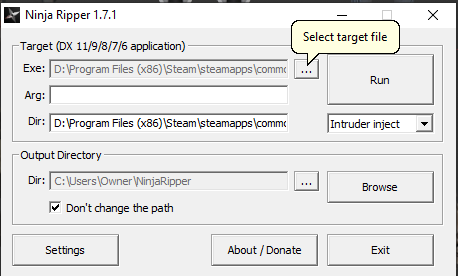
5. Navigate to C:\Program Files (x86)\Steam\steamapps\common\Star Wars - The Old Republic\swtor\retailclient
6. Select swtor.exe.
7. In the NinjaRIpper settings, under the drop-down menu that says Intruder inject, instead select D3D9 wrapper. This is because SWTOR uses DirectX 9.
8. Select Run. Nothing will seem to happen, but a file will be placed in the swtor.exe 's directory. This is because SWTOR is not launched directly from the .exe file, and instead you must log in to the game through their launcher.
¶ Ripping the Model
- Launch SWTOR on Steam to open the SWTOR Launcher.
- Log in.
- Select Play/Launch to actually launch the game.
- For this example, we're going to be ripping a helmet. Technically, the helmet models in SWTOR are slightly different for Male and Female models, but with the low detail of NWN / SWLOR's graphics, the difference is subtle enough that it's hard to tell the difference. However, the different Body Types in the game do change the proportions and scaling of the helmets, so you'll want to select a character with the default body, Body 2.
- Once you're in the game, press
CTRL+Cto open the Collections window. - Today, we want to rip the Arctic Trooper's helmet. So, we're going to put
arcticup in the filter search bar.- Click on the Arctic Trooper's Armor Set, then
CTRL+[LeftClick]on the icon of the helmet. This opens the Preview window to show how it looks on your character. - The way NinjaRipper works is it captures every 3D model visible on the screen and in the nearby area. This includes both the actual character in the game world, as well as the separate 3D model of the character shown in the Preview window. That last part is what we're interested in.
- Click on the Arctic Trooper's Armor Set, then
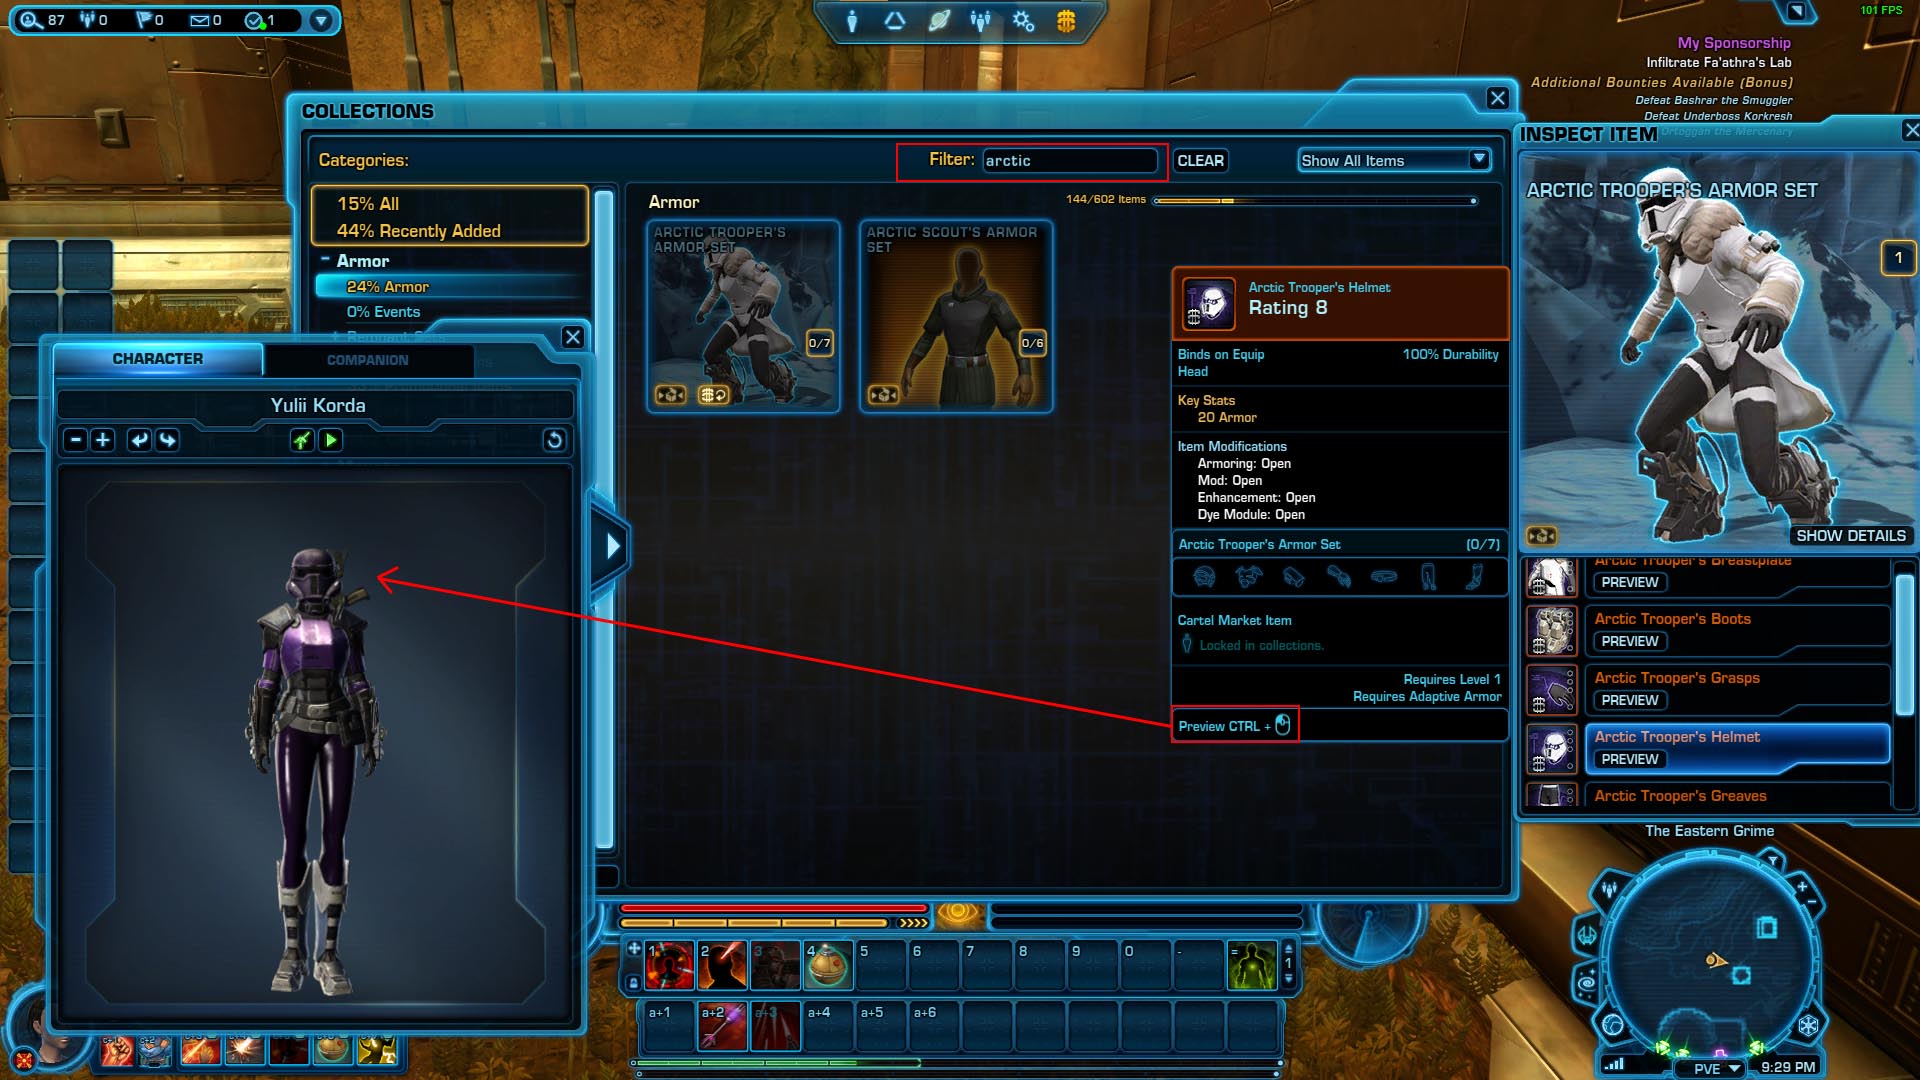
7. Press F10. If NinjaRipper was hooked in correctly, the game will freeze for about 5-20 seconds, depending on the size and complexity of the surrounding area (for example, being out on a planet vs being inside your character's starship).
8. Once the game unfreezes, the rip is complete.
¶ Finding and Extracting the Desired Model
- Open Noesis.
- On the left side file tree, navigate to
C:\Users\Owner\NinjaRipper\_NinjaRipper. - All rips you make are automatically stamped with the date and time of the rip. Find the timestamp of the rip you just made. Open the folder inside.
- A list of files should appear. A lot of
.ripand.ddsfiles. Double-clicking the file will preview it and show either the 3D model or the texture on the right side. Models are not shown with textures, and if you go through all the models, some textures will begin displaying themselves on top of some models, making everything look extremely strange. Ignore this. Noesis just has a hard time with.ripfiles. - From here, there's no easy way to find the correct model we want. For SWTOR in particular, however, the way files are dumped out seem to be organized in loose groups. The character in the Preview window always appears first in the list. On top of that, using the Size of the file is a good way to make an educated guess about the size and complexity of the model. For example, a 7kb file is a small cylinder of some sort…
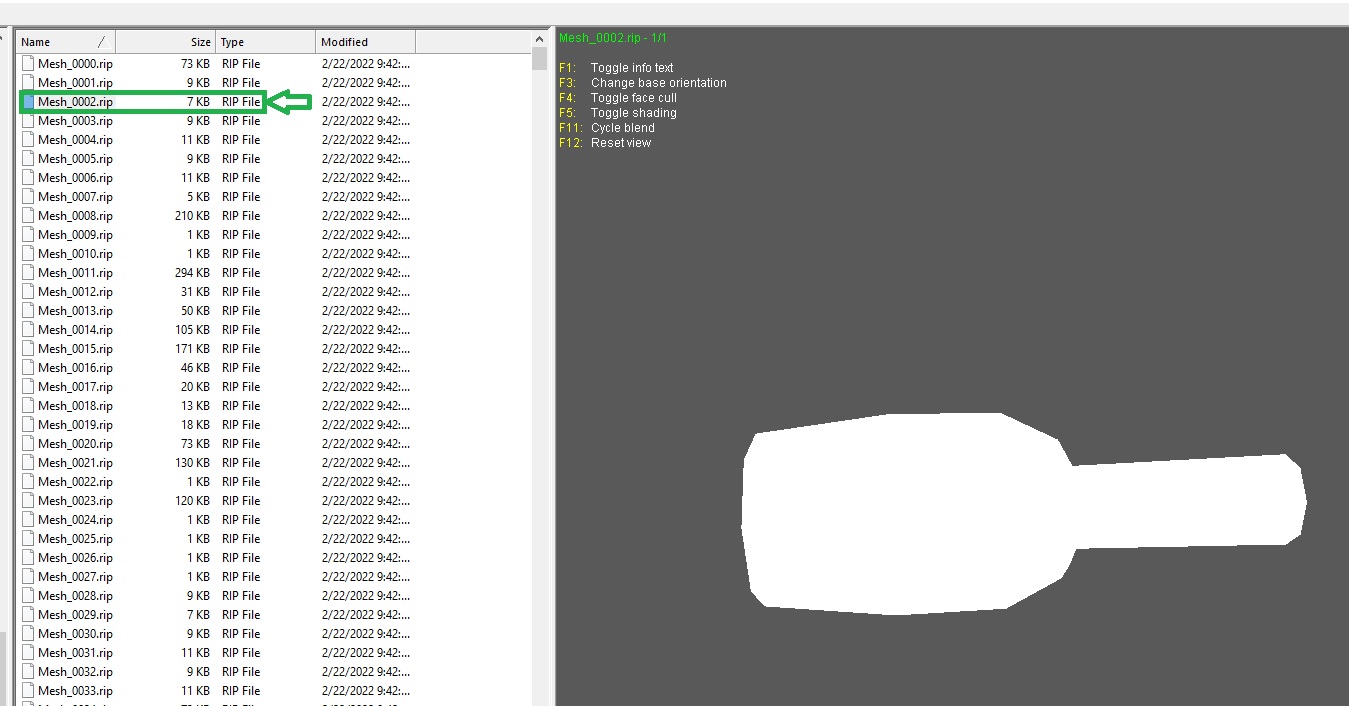
...while a larger 294kb file is the character's chest armor:
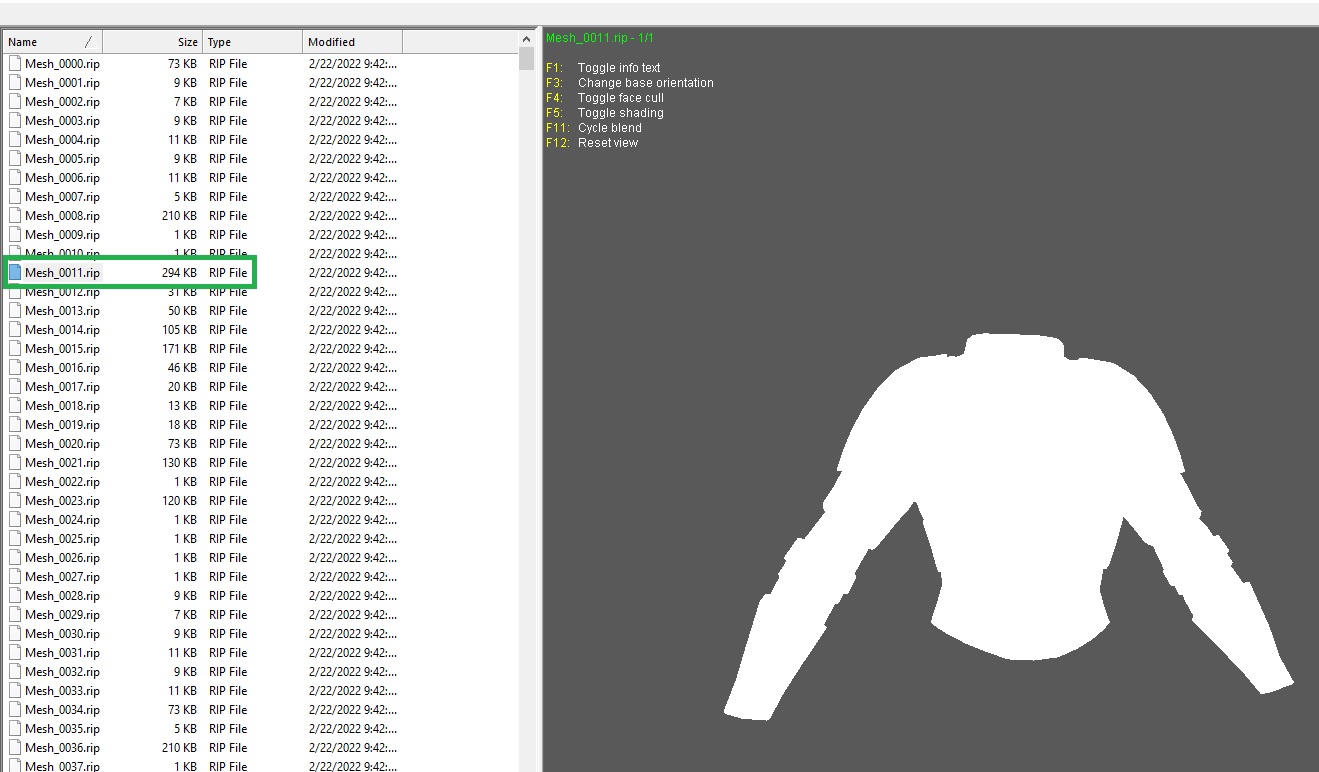
…But what we're looking for is the helmet:
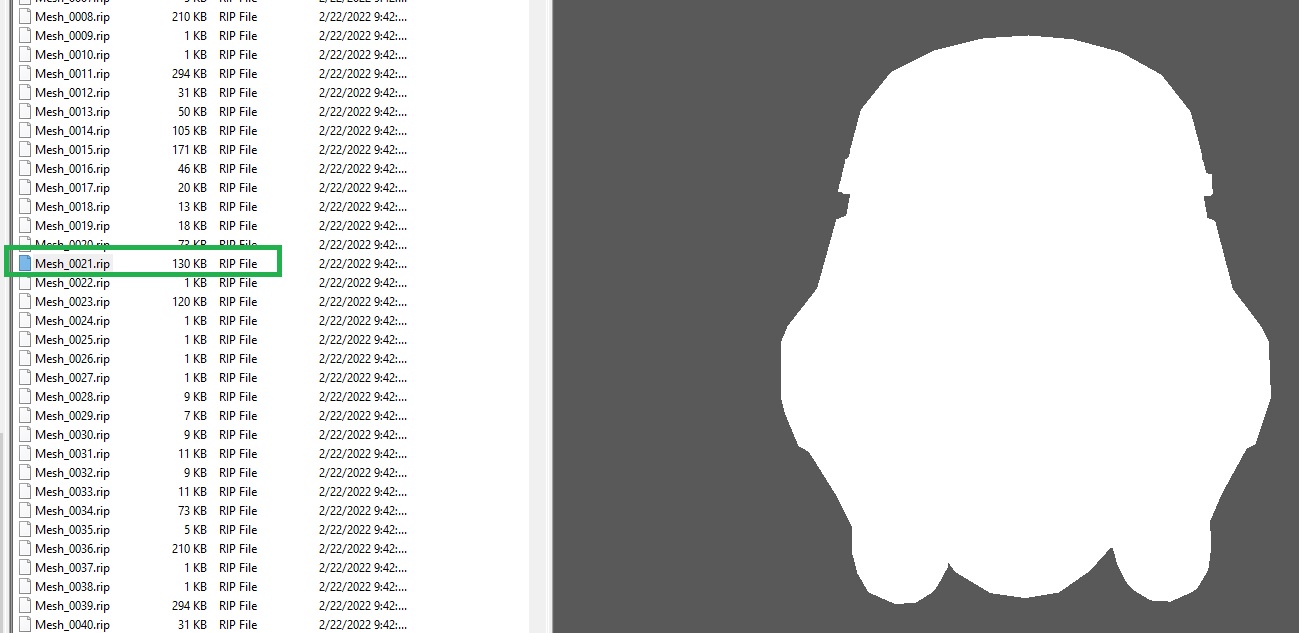
In this case, it's Mesh_0021.
6. Right-click the file and select Export.
7. Under “Main output type”, select .fbx - Autodesk FBX. This is a file format that Blender supports by default, and avoids issues that some other file formats have (for example, .obj exports from SWTOR have their textures flipped upside down for some reason).
7a. Also, make sure to name the output file to something you can remember. Keeping default filenames gets out of hand quickly if you work with multiple files.
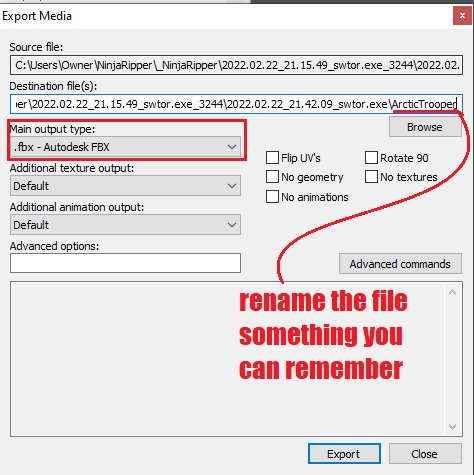
8. Select Export, then close the window.
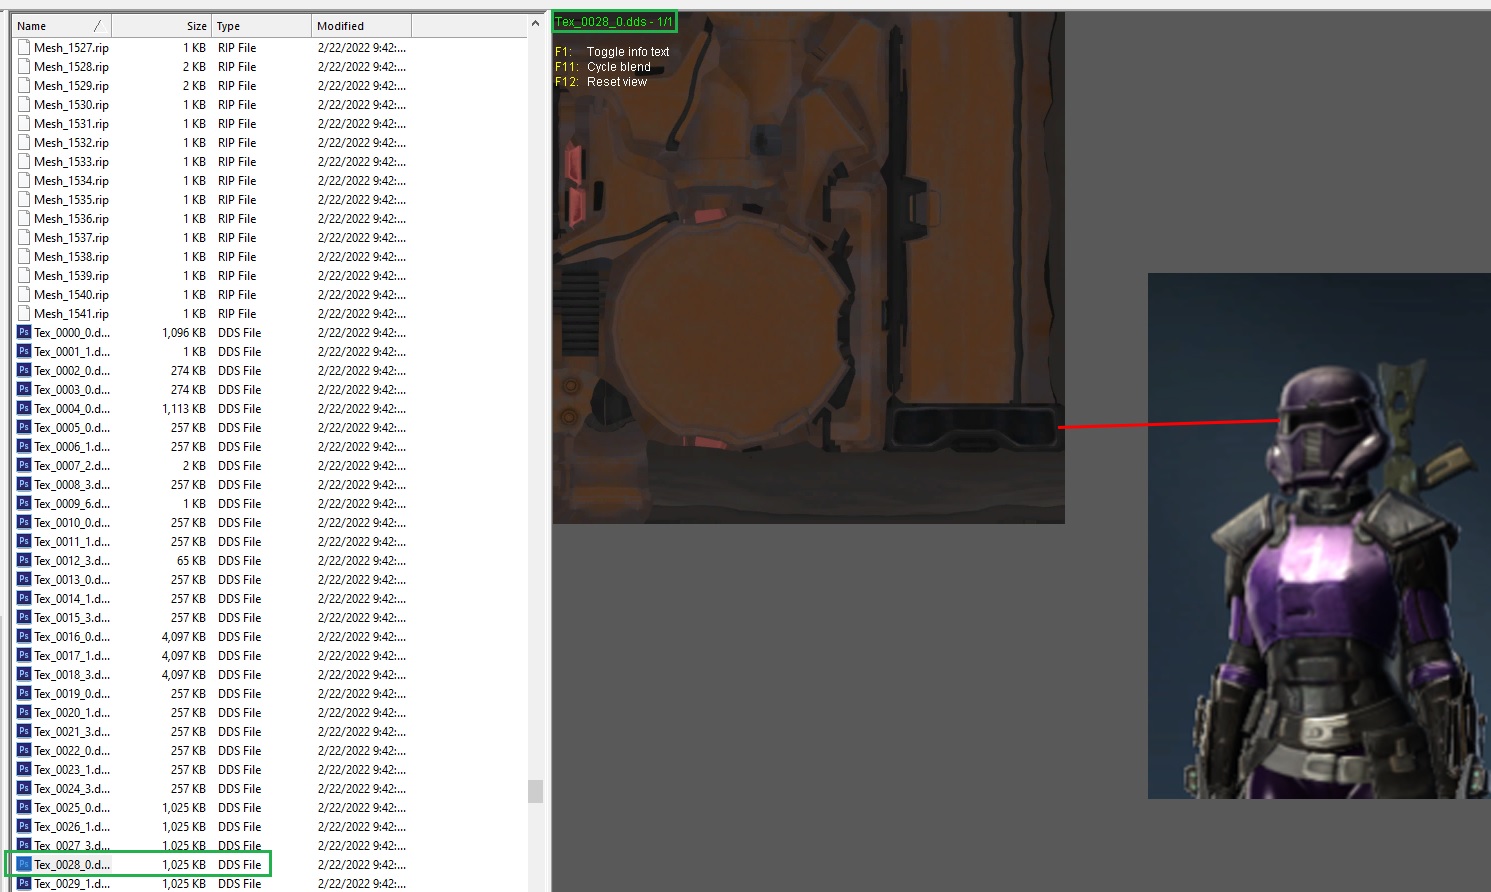
9. Next, scroll down the list of files until you find a lot of .dds files.
10. Start previewing texture files to search for our helmet. Again, there's no easy way to find what you want, except by eyeballing the file size. On top of that, textures can look bizarre and strange, often seeming to have little resemblance to the shape of the 3D model. Finding the texture you want involves searching for certain “landmarks” that you might recognize. In this case, we can recognize the helmet's visor in the corner of this texture:
11. Right-click the texture file and select Export.
12. The default export for textures is .tga. For SWTOR, we don't want to change this. Photoshop and many other image programs can open this. Many SWTOR textures have transparency baked into them, which sometimes can be useful (for example, when ripping UI elements for icons).
13. Export the file and close the window.
14. Right-click on any file and select Open in Explorer. In the new window, it can be easiest to find your new files by sorting by Date Modified. Copy your new files.
15. Open a new Explorer window and navigate to C:\Users\Owner\Documents\Neverwinter Nights\development. If the development folder does not exist, create it with rightClick > New > New Folder.
16. Place your SWTOR files into the development folder.
¶ Importing into Blender
- Launch Blender.
- Create a new file.
- A new file comes with three objects in it: A Camera, a Cube, and a Light. Delete these.
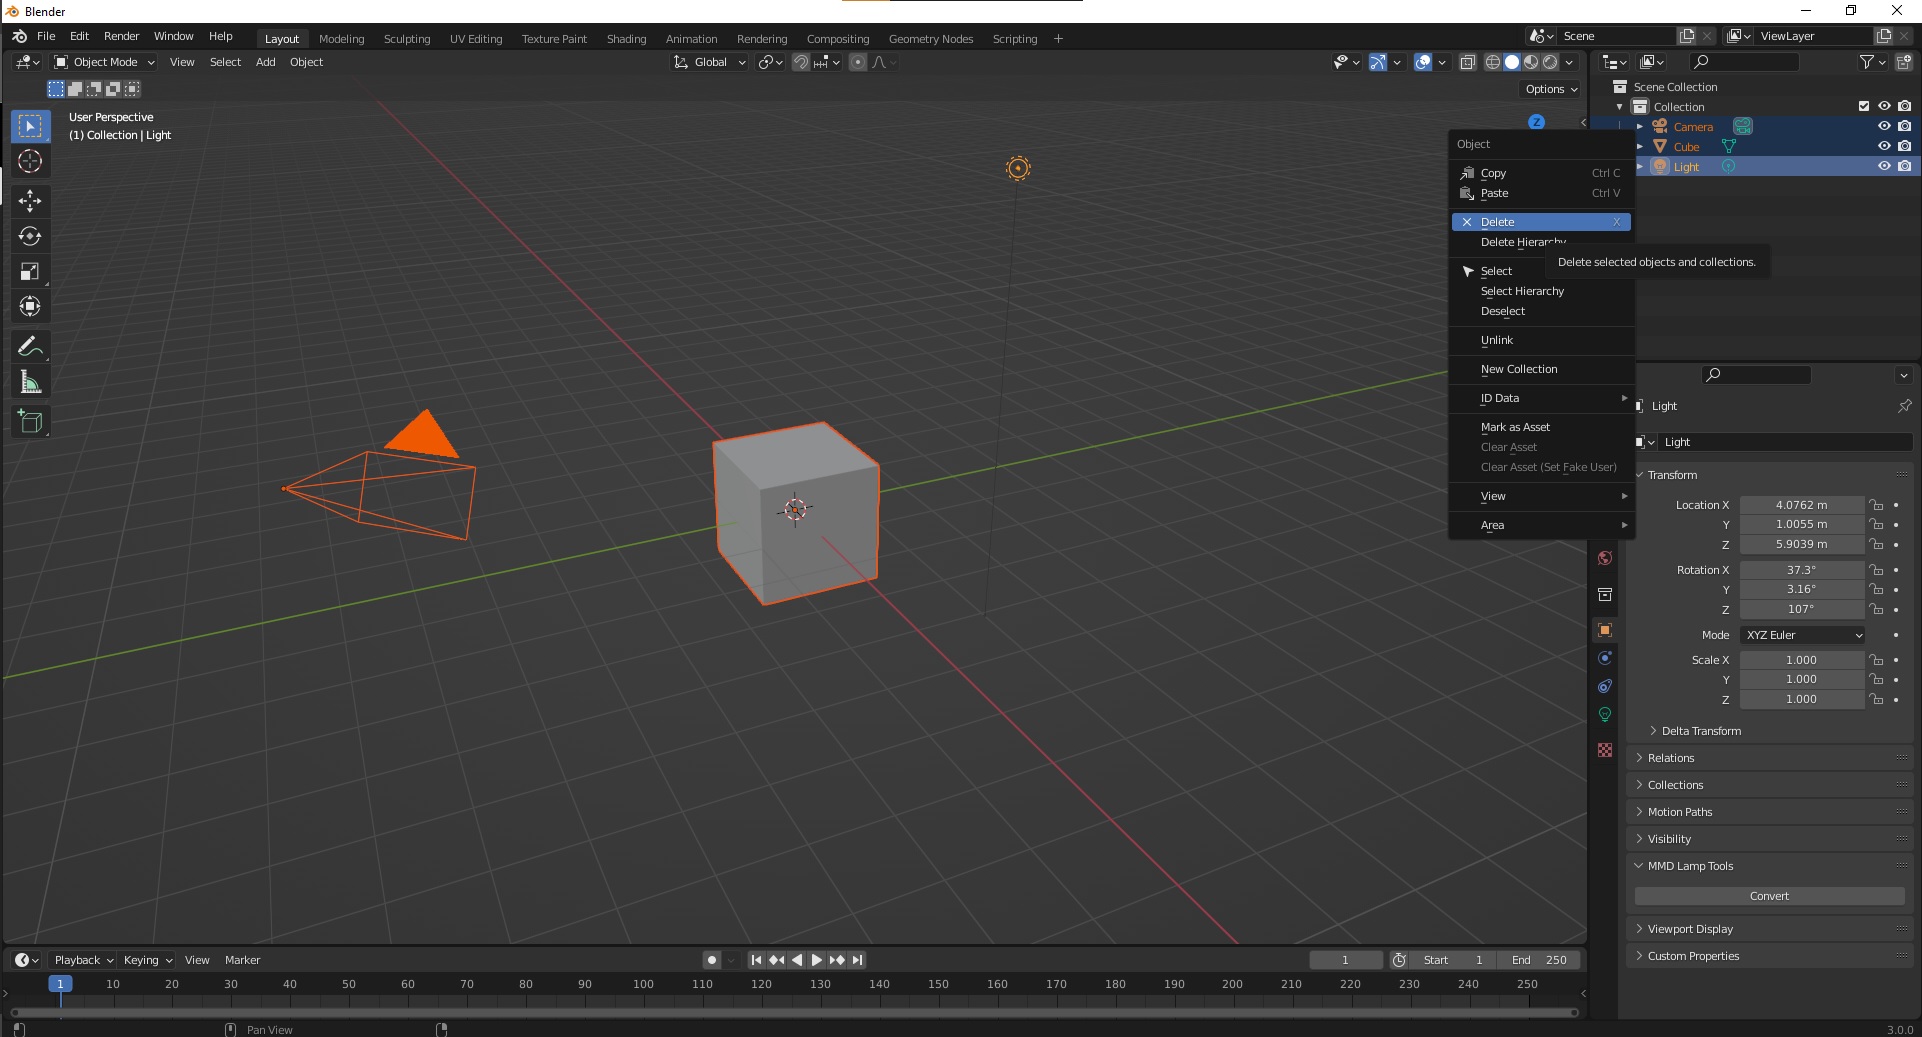
4. Select File > Import > FBX.
5. Navigate to C:\Users\Owner\Documents\Neverwinter Nights\development. Import your ArcticTrooper.fbx file.
6. Ta-dah, you have a SWTOR model ripped into Blender!